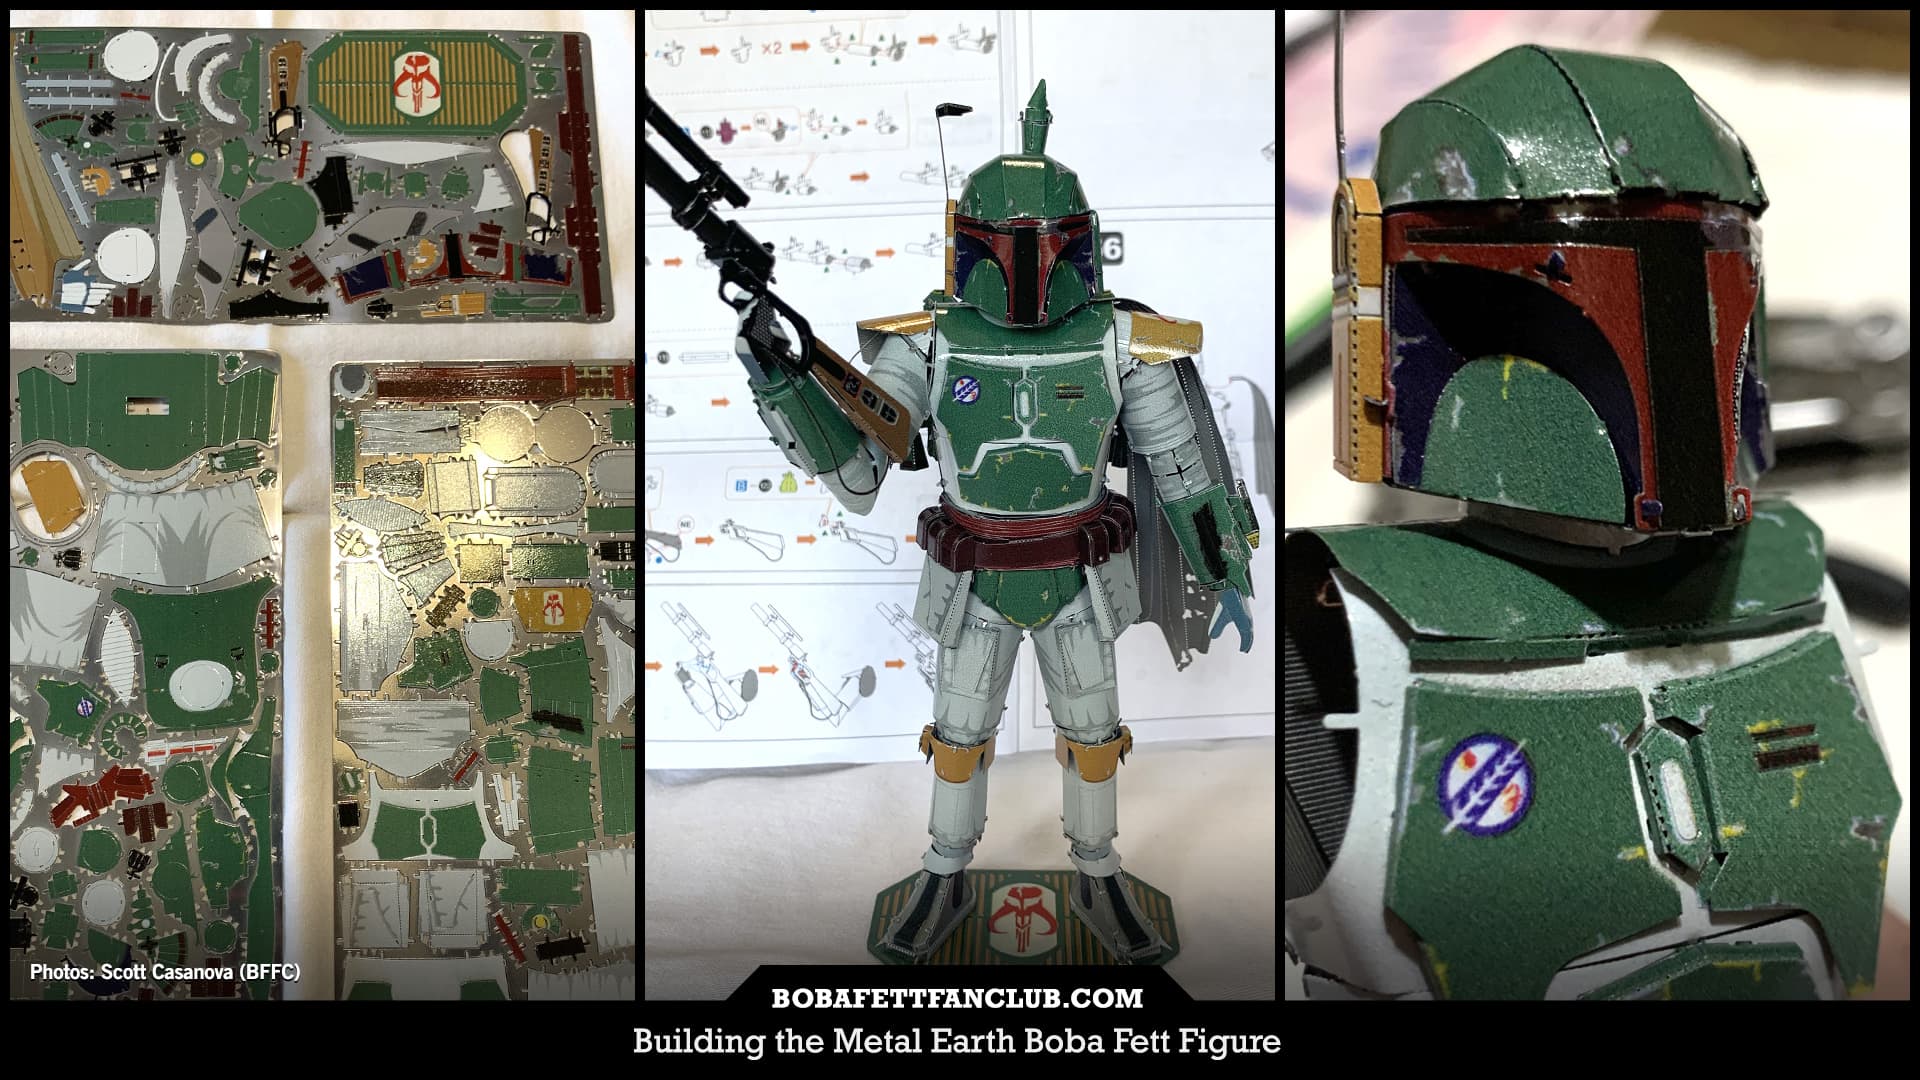
Building the Metal Earth Boba Fett Figure
Part 2 of 2 in a series on Metal Earth’s Boba Fett collection.
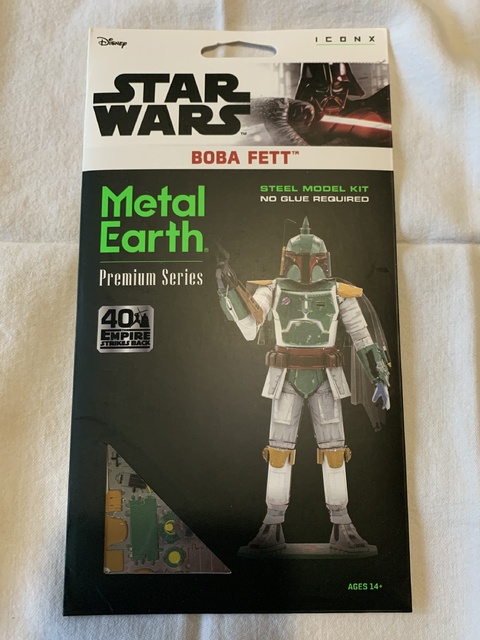
The new Metal Earth Boba Fett model kit is the largest and most difficult Metal Earth kit I’ve done.
My review of Fascination Inc.’s earlier release, the Metal Earth Boba Fett helmet kit, would be a nice starting point for this review if you haven’t read it.

Metal Earth was kind enough to provide the Boba Fett Fan Club a kit for this review so I took the money I would have spent on the kit and bought their tool set. I’ll touch on that through out too.
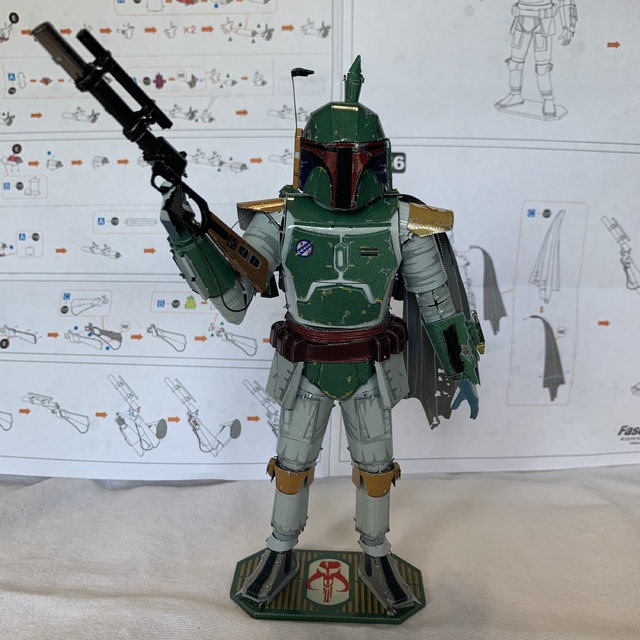
The finished model stands at 7-3/4” tall including base and jetpack missile. It is full of complex folds, joints, and curves.
The Figure
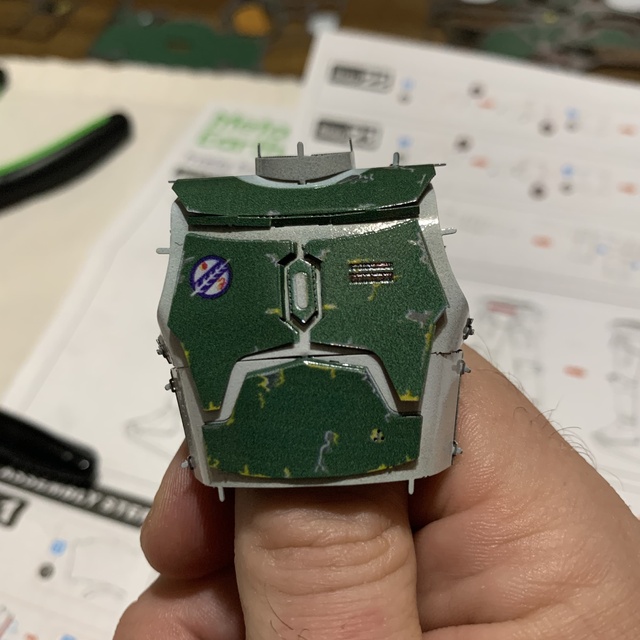
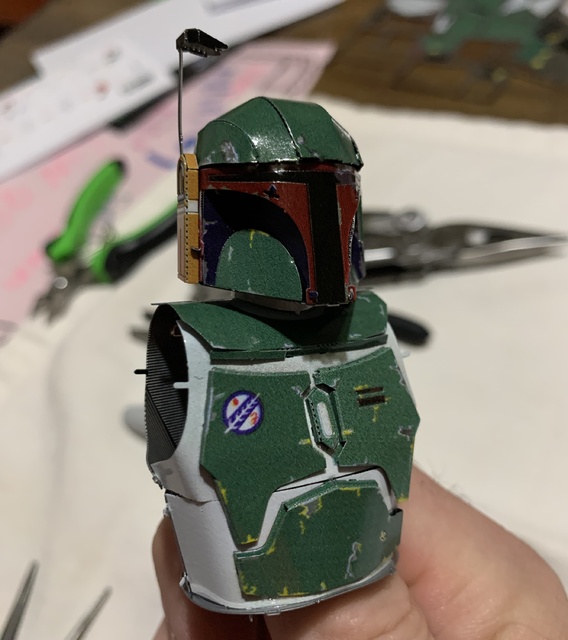
Part of their ICONX Premium Series, this Boba Fett also falls under the 40th anniversary of “The Empire Strikes Back” merchandise campaign. He is appropriately modeled and colored in his “Empire” variant armor. I have to say that the lengths that Metal Earth went to to duplicate some of the tiniest details is incredible when you start looking closely. The printed detail on the pieces is fantastic.

First, they got the right skull. You would think at this point everyone could get the skull right for their variants but sadly that is not the case. His chest insignia, his chest lights, the coloring and markings on his jet pack, the gauntlet detailing, his boots, and the discoloration and folds in his flight suit are all painted in. Given how tiny some of this detailing is it really is amazing.


On top of that they’ve added in some of the more prominent weathering patterns. I think we’ve reached a point where a Fine Arts student could do a doctoral thesis on recreating Fett’s on-screen weathering patterns, so I tend not to look to closely there when critiquing accuracy. They’ve even printed in the strap that connects the kidney plate to the cod piece. Both sculpted for texture and printed for color is the back of the girth belt. It’s an incredible amount of detail for something that will be rarely seen (cause it’s on the back) and barely seen because the ammo belt and sidearm holster partially cover it. Trust me, there’s a ton of detail under there.
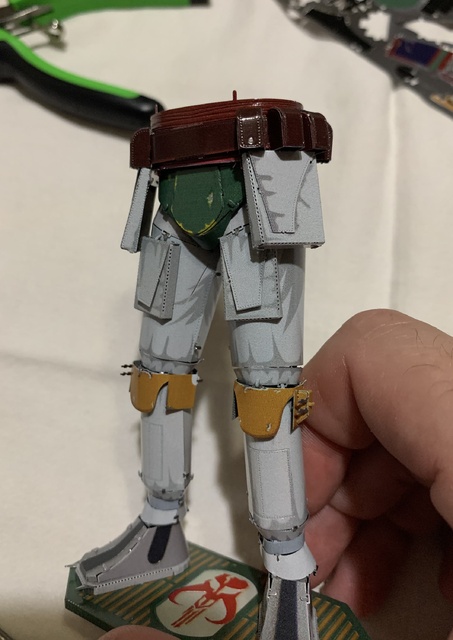
Other details are fully recreated three dimensionally. The knee pads wrap all the way around the leg to show the straps. Each of the 7 ammo pouches are individual pieces with two variations in design amongst the seven. The hip and thigh pouches each have a physical piece for the flap as opposed to just printing them on (even though the flap is also printed underneath the added piece). Similarly, the cod piece has an added panel on the front to give it the depth and texture of 3D even though the outline and detailing of that added piece are also printed on underneath it. Also, each piece of the chest armor is a separate piece added to the flak jacket.
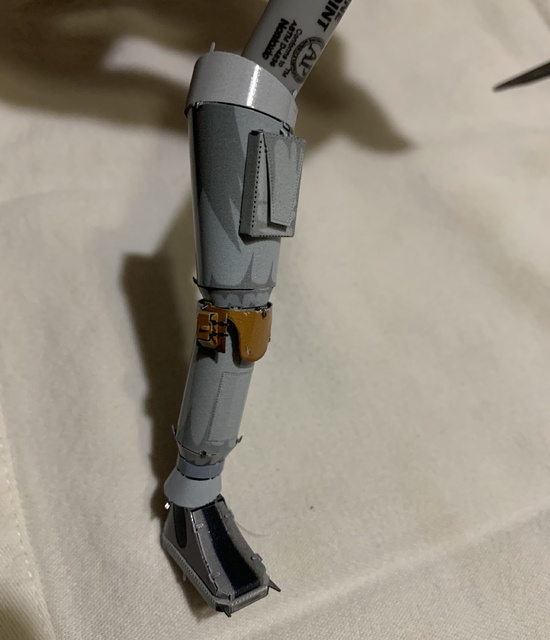
The only thing missing are the shin tools. The shin pouches are outlined in the printing, but I was surprised given the complexity of some of the tiny features on the gauntlets and jet pack that there weren’t physical shin pouches to attach, or any representation of the shin tools.
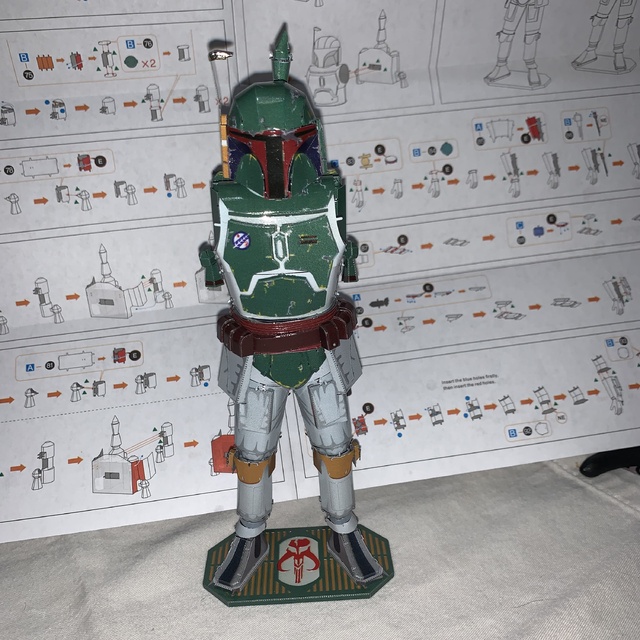
Lastly, I love the look of the base. The green and yellow deck plating with the Mythosaur skull just looks amazing. It makes me hope that the floors of Slave I is this same green and yellow scheme.
The Build
I was surprised with how well most of this went together with me. All told, I spent about 8 hours assembling this. I’ve gotten considerably better at the rolling and curving of the pieces that need that. It works best when you have a screwdriver shaft or pen or battery to start the shape. Pro tip: the arms and legs are pretty close in size to that of a sharpie. Many pieces that I thought would be really challenging: the ammo pouches, the knee darts, and the gauntlet weapons, turned out coming together easily.

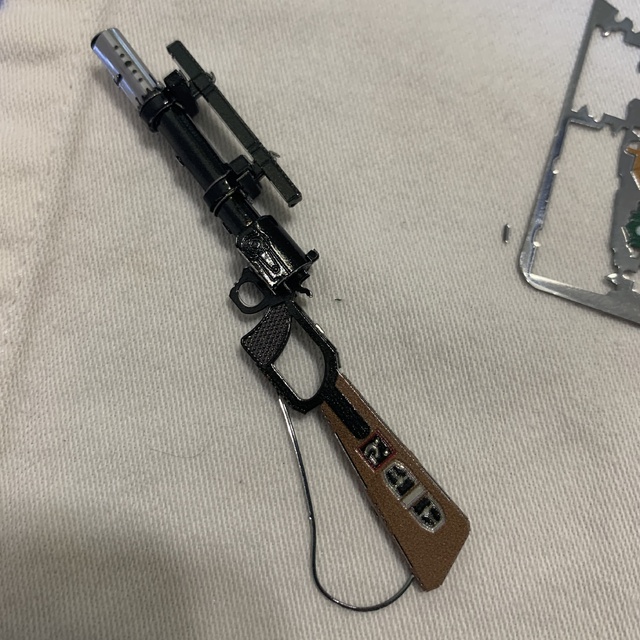
The hardest parts (as can be seen by the pics) were the jetpack missile and thruster nozzles. You can tell which nozzle I did first because it looks a lot worse. I also found as I went along that taking a little liberty with the instructions helped things go together better.
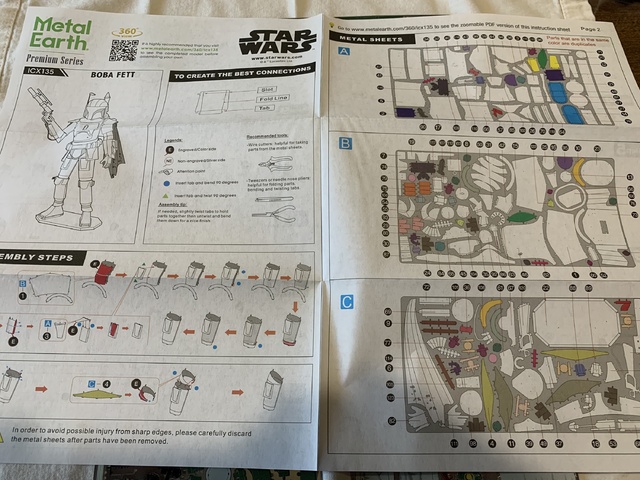

The instructions consistently tell you to form each new piece into its final shape before attempting to attach it. Frequently the final form of the piece makes it more difficult to access the tabs to twist or bend them into holding everything together. In a couple places in the legs and arms I would attach the new piece first and then form it into shape and usually came out with a better seem and tighter fit. The left leg and the right arm went together much easier and better than it’s opposite having learned from building that piece first.
The Tools
Their tool kit (sold separately) comes with a pair of snippers, needle nose pliers, and flat nose pliers. The clippers were worth the cost of purchase alone. I’ve always had difficult removing the pieces from their sheets and having tried different things the Metal Earth clippers have worked best. The needle nose pliers were especially helpful given some of the tight spaces in this model.
To be honest I didn’t use the flat nose pliers once on this build but it may come in handy for other kits. I did break out the old leatherman knife to bend some tabs that needed wiggling away from the sides of other pieces but this was mostly built with the Metal Earth tool.
Summary
If you’ve never built a Metal Earth model before, please start with an easy one. Maybe even something you don’t have a vested interest in. They’re challenging, but once you start to get the hang of it they’re actually very rewarding.

Pay attention to the difficulty level. If you are up to the challenge this is definitely a piece for your collection. Everyone who sees my kits are always asking about them and amazed that I can assemble them — me too. While it’s not screen accurate and has the tabs for assembling showing in places, it still has an incredible look and will definitely stand out. The time spent assembling it helps create a relationship with this kit, as opposed to buying a figure and placing it on a shelf for display.

It also generates a sense of accomplishment when you get to the end, something to take a bit of pride in. And if you’re afraid to build it, ask a modeling friend. Or send it to me, they’ll only get better! Time to choose my next kit…
Rating

Photos: Scott Casanova
About the Author, Scott Casanova
Scott reviews and compares Boba Fett collectibles from chachkis to toys to high end statues and replicas. Aside from Boba Fett he has a huge passion for and collection of the Lego Ultimate Collector Series sets. When not bounty hunting Scott works as an event technician at Syracuse University.
BFFC Member #1506
Comments